(→Trivia) |
m (Fixed links) |
||
| (34 intermediate revisions by 17 users not shown) | |||
| Line 1: | Line 1: | ||
| ⚫ | |||
{{Spoiler}} |
{{Spoiler}} |
||
| ⚫ | |||
{{SimilarName|the '''Aurora'''|the [[Wrecks]] or [[Degasi]]}} |
{{SimilarName|the '''Aurora'''|the [[Wrecks]] or [[Degasi]]}} |
||
{{Flora |
{{Flora |
||
| Line 12: | Line 12: | ||
[[File:Lifepod1.ogg]]|PDA|Dialogue}} |
[[File:Lifepod1.ogg]]|PDA|Dialogue}} |
||
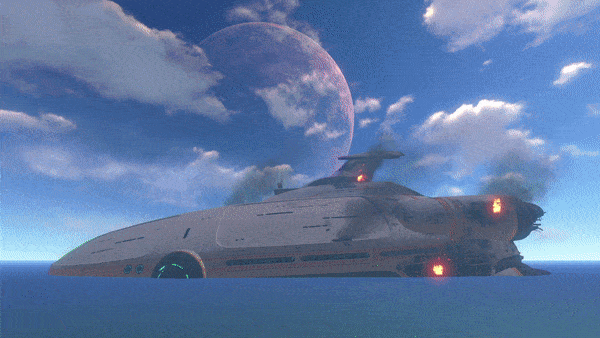
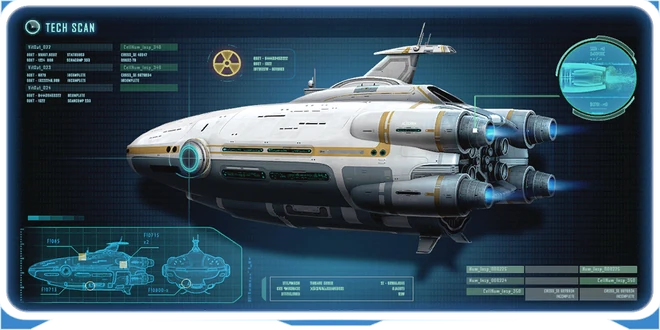
| − | The '''Aurora''' is a spacecraft sent to the Ariadne Arm by the [[Alterra Corporation]] in order to build a phasegate. However, its secondary mission, unknown to most of the crew, was to search for and, |
+ | The '''Aurora''' is a spacecraft sent to the Ariadne Arm by the [[Alterra Corporation]] in order to build a phasegate. However, its secondary mission, unknown to most of the crew, was to search for and, possibly, rescue the survivors of the [[Degasi]] crew. |
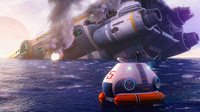
During a gravity slingshot maneuver around [[Planet 4546B]], the Aurora was struck by a mysterious energy pulse, resulting in catastrophic hull failure, leading to its crash landing on the surface of the planet. It is later revealed that it was the [[Quarantine Enforcement Platform]] that shot it down. Many [[Destroyed Lifepods|Lifepods]] were destroyed by the energy pulse and the ones that did launch were all compromised with the exception of two: [[Lifepod 5]], which contained [[Ryley Robinson]], and Lifepod 4, though its flotation devices seemingly failed or was possibly overturned by a [[Reaper Leviathan]]. |
During a gravity slingshot maneuver around [[Planet 4546B]], the Aurora was struck by a mysterious energy pulse, resulting in catastrophic hull failure, leading to its crash landing on the surface of the planet. It is later revealed that it was the [[Quarantine Enforcement Platform]] that shot it down. Many [[Destroyed Lifepods|Lifepods]] were destroyed by the energy pulse and the ones that did launch were all compromised with the exception of two: [[Lifepod 5]], which contained [[Ryley Robinson]], and Lifepod 4, though its flotation devices seemingly failed or was possibly overturned by a [[Reaper Leviathan]]. |
||
| − | Upon crashing, the Aurora plowed into the terrain, unearthing it and leaving small sand hills around the ship, resulting in huge quantities of [[Metal Salvage]] and [[ |
+ | Upon crashing, the Aurora plowed into the terrain, unearthing it and leaving small sand hills around the ship, resulting in huge quantities of [[Metal Salvage]] and [[Supply Crate]]s being dispersed within the vicinity of the ship, providing useful materials such as [[Food & Water]], [[Battery|batteries]], and [[titanium]]. Multiple [[Reaper Leviathan]]s patrol the crash site. |
| − | By the time the Player awakens and begins his exploration of the area, all of the other Lifepods have been destroyed and their occupants have vanished. After the Aurora's Drive Core explodes, the ship's wreckage is surrounded by [[Radiation]] and is unapproachable without a [[Radiation Suit]]. While quite dangerous and far out, it is possible for the player to visit the Aurora early in-game before it explodes, although |
+ | By the time the Player awakens and begins his exploration of the area, all of the other Lifepods have been destroyed and their occupants have vanished. After the Aurora's Drive Core explodes, the ship's wreckage is surrounded by [[Radiation]] and is unapproachable without a [[Radiation Suit]]. While quite dangerous and far out, it is possible for the player to visit the Aurora early in-game before it explodes, although multiple [[tools]] are needed to properly explore the ship. |
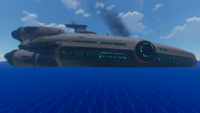
| − | The Aurora is located on the far eastern edge of the map, with its bow facing north and its stern facing south. It is visible from the surface nearly anywhere on the map, making it a useful landmark, especially if the player lacks a [[compass]]. |
+ | The Aurora is located on the far eastern edge of the map, with its bow facing north and its stern facing south. It is visible from the surface nearly anywhere on the map, making it a useful landmark, especially if the player lacks a [[compass]]. The ship is approximately 1,280 meters long from nose to thrusters. Including parts normally hidden by the terrain, it stands to be about 500 meters tall. |
==Mission== |
==Mission== |
||
| Line 37: | Line 37: | ||
Alterra Corp. currently operates 9% of all phasegates in the galaxy. If the Aurora's mission is successful Alterra will have outmaneuvered a cabal of Mongolian corporations, operating a range of outposts and mines in the region. |
Alterra Corp. currently operates 9% of all phasegates in the galaxy. If the Aurora's mission is successful Alterra will have outmaneuvered a cabal of Mongolian corporations, operating a range of outposts and mines in the region. |
||
| − | |source=Pick up [[# |
+ | |source=Pick up [[#Databank Checklist|Abandoned PDA]] in the Aurora. |
}} |
}} |
||
| Line 58: | Line 58: | ||
- Additional aquatic and all-terrain vehicles have been included in the Aurora's cargo package for this mission<br /> |
- Additional aquatic and all-terrain vehicles have been included in the Aurora's cargo package for this mission<br /> |
||
- Degasi crew manifesto has been distributed to senior employees in a separate message |
- Degasi crew manifesto has been distributed to senior employees in a separate message |
||
| − | |source=Pick up [[# |
+ | |source=Pick up [[#Databank Checklist|Abandoned PDA]] in the Aurora. |
}} |
}} |
||
==PDA Speech== |
==PDA Speech== |
||
| − | The [[PDA]] reports the Aurora's state |
+ | The [[PDA]] reports the Aurora's state and information about the environment to the player as they survive. During exploration of the Aurora, it will explain the state of the ship around you. |
===Intro=== |
===Intro=== |
||
| Line 165: | Line 165: | ||
The explosion is focused towards the front section of the ship. The player can be killed by the explosion if in the crash zone biome when the event occurs. |
The explosion is focused towards the front section of the ship. The player can be killed by the explosion if in the crash zone biome when the event occurs. |
||
| − | Only after the explosion is the Player able to explore inside the Aurora, but |
+ | Only after the explosion is the Player able to explore inside the Aurora, but if they are not equipped with a radiation suit they will suffer damage over time. All three parts to the suit must be equipped in order to negate the radiation damage. Upon entry, the PDA warns that creatures around the Aurora contain traces of human tissue inside their digestive systems, indicating all bodies were consumed by [[Bleeder]]s and [[Cave Crawler]]s. Also, fire and falling debris can injure the Player, and periodic shaking of the hull occurs. Further dangers are posed by the Reaper Leviathans that spawn around the ship, Cave Crawlers that litter the entrance area of the ship, and Bleeders in the underwater sections within the Aurora. |
For avoiding the Reapers, there is usually one patrolling between the basin West of the Aurora, and the deep chasm beneath its bow. A [[Seamoth]] can safely sneak past by approaching from the [[Safe Shallows]] nearest to the Aurora and hugging the Aurora's side, until reaching a gap large enough for the Seamoth to squeeze through. It is recommended to disembark in shallow water so that the ramp beneath you will protect you from Reaper attack, though the Reaper doesn't normally swim that close to the entrance. |
For avoiding the Reapers, there is usually one patrolling between the basin West of the Aurora, and the deep chasm beneath its bow. A [[Seamoth]] can safely sneak past by approaching from the [[Safe Shallows]] nearest to the Aurora and hugging the Aurora's side, until reaching a gap large enough for the Seamoth to squeeze through. It is recommended to disembark in shallow water so that the ramp beneath you will protect you from Reaper attack, though the Reaper doesn't normally swim that close to the entrance. |
||
| − | The following equipment is recommended for exploring the Aurora: |
+ | The following equipment is recommended and/or required for exploring the Aurora: |
* [[Radiation Suit]] (required to approach the Aurora) |
* [[Radiation Suit]] (required to approach the Aurora) |
||
| − | * |
+ | * [[Stasis Rifle]], for self defense from [[Cave Crawler]]s, [[Bleeder]]s, and possibly [[Reaper Leviathan]]s. |
* [[Repair Tool]], for repairing the Drive Room and mending broken doors. |
* [[Repair Tool]], for repairing the Drive Room and mending broken doors. |
||
| − | * [[Propulsion Cannon]], for removing crate barriers at both the main hallway and Laboratory entrance, and to remove the Bleeders from the player's arms. A [[Repulsion Cannon]] is also a viable tool for removing crates and barriers. |
+ | * [[Propulsion Cannon]], for removing crate barriers at both the main hallway and Laboratory entrance, and to remove the Bleeders from the player's arms. A [[Repulsion Cannon]] is also a viable tool for removing crates and barriers. They could also be used for self defense against Cave Crawlers and bleeders. |
* [[Fire Extinguisher]], for various fires (some can be found on site) |
* [[Fire Extinguisher]], for various fires (some can be found on site) |
||
* [[Laser Cutter]], for entering various rooms including the Prawn Suit Bay and Aurora Black Box Terminal. |
* [[Laser Cutter]], for entering various rooms including the Prawn Suit Bay and Aurora Black Box Terminal. |
||
* A [[Seaglide]] for quick navigation through the submerged sections. |
* A [[Seaglide]] for quick navigation through the submerged sections. |
||
* A [[Knife|Survival Knife]] / [[Thermoblade]] to kill the [[Bleeder]]s. |
* A [[Knife|Survival Knife]] / [[Thermoblade]] to kill the [[Bleeder]]s. |
||
| + | It's not possible to build a Seabase inside the Aurora; [[Base Pieces]] cannot be placed anywhere inside the ship, even if there's room. By extension, no interior modules can be placed either. It is possible to place [[Exterior Modules]] in the Aurora, notably the [[Exterior Growbed]]. A Seabase can be built right next to the Aurora with no problem. |
||
| − | There are two routes to the inside of the ship. The first is on the right side of the shore area of the torn up front section and constitutes an entryway behind a [[Floodlight]] blocked off by various crates. Behind the crates are a Fire Extinguisher and a fire to put out, after which the Player will find themselves in the Laboratory. The second requires going up a ramp in the torn up front section of the Aurora, the Player can enter a corridor that leads inside the ship. On the way up, the user can find several |
+ | There are two routes to the inside of the ship. The first is on the right side of the shore area of the torn up front section and constitutes an entryway behind a [[Floodlight]] blocked off by various crates. Behind the crates are a Fire Extinguisher and a fire to put out, after which the Player will find themselves in the Laboratory. The second requires going up a ramp in the torn up front section of the Aurora, the Player can enter a corridor that leads inside the ship. On the way up, the user can find several Supply Crates with crafted items inside of them. The door leading to the T-section is partially blocked off by fire. Fortunately, there are a few Fire Extinguishers lying around, which can come in handy. When the Player enters, there will be a sign to the left that says Airlock. |
To the right of the T-section, there is a door which is blocked off by fire. The left corridor leads to the "Cargo Bay 3". The right door leads to "Administration". These rooms are indicated by signs on the Aurora itself. |
To the right of the T-section, there is a door which is blocked off by fire. The left corridor leads to the "Cargo Bay 3". The right door leads to "Administration". These rooms are indicated by signs on the Aurora itself. |
||
===Administration Office=== |
===Administration Office=== |
||
| − | The administration office has a Data Terminal with a downloadable log titled "[[ |
+ | The administration office has a Data Terminal with a downloadable log titled "[[Databank#Alterra Launches the Aurora|Alterra Launches the Aurora]]". The office also contains shelves, a [[Desk]], and a [[Prawn Suit Poster - Land]] which can be taken. It also contains an Abandoned PDA with a Data Download under the headline "[[Databank#Notes to self|Notes to self]]", which will give the player the code "1454". You can also collect batteries on the shelf behind the main desk. |
===Cargo Bay 3=== |
===Cargo Bay 3=== |
||
| − | Down the left corridor, there is rubble blocking the entrance to Cargo Bay 3. Before this, an Abandoned PDA named "[[ |
+ | Down the left corridor, there is rubble blocking the entrance to Cargo Bay 3. Before this, an Abandoned PDA named "[[Databank#Aurora Engineering Drone - Log|Aurora Engineering Drone - Log]]" next to a single Propulsion Cannon Fragment, right at the start of the ramp leading to the entrance. These can be gotten around dropping down from above or by using the Propulsion Cannon or Repulsion Cannon to move these out of the way. Alternatively, the player can jump and sprint from the slope to the first large cargo container, and then from there to the top of the pile. Note that in doing so, there is a fire that cannot be put out; it must simply be avoided. There is then a locked door with a keypad that can be interacted with. Entering the code from the previously mentioned Data Download into the keypad will open the door. Alternatively, you can unlock the door without using a code from the other side. The Cargo Bay is a large area full of cargo containers, Supply Crates, forklifts, and a few other miscellaneous things. Very rarely, up to three [[Cyclops|Cyclops Engine Fragments]] can appear inside some of the large cargo containers |
| − | There is a cargo elevator in the cargo bay, which is stuck halfway. Close to it, there's an Abandoned PDA named "[[ |
+ | There is a cargo elevator in the cargo bay, which is stuck halfway. Close to it, there's an Abandoned PDA named "[[Databank#Trans-Gov Profile: Alterra Corp.|Trans-Gov Profile: Alterra Corp.]]". |
Following the ramp down reveals an underwater section which leads to a T-corridor. To the left, there will be a Sealed Door. To the right, there is a room called the "Seamoth Bay". |
Following the ramp down reveals an underwater section which leads to a T-corridor. To the left, there will be a Sealed Door. To the right, there is a room called the "Seamoth Bay". |
||
===Seamoth Bay=== |
===Seamoth Bay=== |
||
| − | The door to this room is locked, but there is a damaged panel which the Repair Tool can repair. When this panel is repaired, the door is unlocked, and the player can enter. The Seamoth Bay contains two pieces of a damaged Seamoth, which can be scanned. It also has a [[Seamoth Depth Module MK1]] [[Upgrade Modules|Upgrade Module]] and an Abandoned PDA called "[[ |
+ | The door to this room is locked, but there is a damaged panel which the Repair Tool can repair. When this panel is repaired, the door is unlocked, and the player can enter. The Seamoth Bay contains two pieces of a damaged Seamoth, which can be scanned. It also has a [[Seamoth Depth Module MK1]] [[Upgrade Modules|Upgrade Module]] and an Abandoned PDA called "[[Databank#VR Suite Log|VR Suite Log]]". |
===Locker Room=== |
===Locker Room=== |
||
| − | Cutting through the Sealed Door will lead the player into a locker room. Some of the lockers are open and have loot inside, like batteries, first-aid kits, and water. There is an Abandoned PDA with a Data Download titled "[[ |
+ | Cutting through the Sealed Door will lead the player into a locker room. Some of the lockers are open and have loot inside, like batteries, first-aid kits, and water. There is an Abandoned PDA with a Data Download titled "[[Databank#Sweet Offer|Sweet Offer]]". It will give the player the code "1869", required for Cabin 1 in the Living Quarters. |
===Prawn Suit Bay=== |
===Prawn Suit Bay=== |
||
| Line 207: | Line 208: | ||
Coming from the Aurora entrance: Remove the crates blocking the doorway, then follow the hallway until there is a fire. On the right lies a fire extinguisher which is useful for putting out the aforementioned fire. Continue until a submerged room is reached. |
Coming from the Aurora entrance: Remove the crates blocking the doorway, then follow the hallway until there is a fire. On the right lies a fire extinguisher which is useful for putting out the aforementioned fire. Continue until a submerged room is reached. |
||
| − | Coming through the Prawn Suit Bay: Go underwater at the far |
+ | Coming through the Prawn Suit Bay: Go underwater at the far left corner from the entrance to the Bay to find a tunnel leading to the lab. A room prior to the actual laboratory contains a Data Terminal with a Data Download titled "[[Databank#Aurora Black Box Data|Aurora Black Box Data]]". There also is a Supply Crate containing a Battery in front of a locked door that requires the Laser Cutter. Behind it is the actual laboratory. |
| − | A nearby Abandoned PDA has a Data Download titled "[[ |
+ | A nearby Abandoned PDA has a Data Download titled "[[Databank#Lab Access|Lab Access]]" containing the code, 6483, for the two nearby doors. These grant access to the storage room, where three [[Lab Container|Large Sample Flasks]] can be found, one Cylindrical Sample Flask, a [[Lab Equipment|Microscope]] and a Sample Analyzer. The two Supply Crates contain [[Disinfected Water]] and there's a Data Terminal that states it de-corrupted the player's PDA and unlocks the Repulsion Cannon. On a [[Counter]] close to the terminal, there's also an Abandoned PDA named "[[Databank#What Can We Learn From the Hive Mind of Strader VI?|What Can We Learn From the Hive Mind of Strader VI?]]". |
===Living Quarters=== |
===Living Quarters=== |
||
| − | The Living Quarters are various rooms that provided living conditions for the various crew and passengers on the ship. If the player goes right, there is a Supply room filled with [[Filtered Water]] and [[Nutrient Block]]s. If the player goes left, there is a Canteen. There are bar tables and chairs lying on the ground, along with a few handy |
+ | The Living Quarters are various rooms that provided living conditions for the various crew and passengers on the ship. If the player goes right, there is a Supply room filled with [[Filtered Water]] and [[Nutrient Block]]s. If the player goes left, there is a Canteen. There are bar tables and chairs lying on the ground, along with a few handy Supply Crates, a vending machine against the wall, a bar with single wall shelves, a fire extinguisher is on the wall behind the bar as well as a [[Keep Calm Poster]], which can be taken. Sitting atop the bar is the Abandoned PDA named "[[Databank#Today's Menu|Today's Menu]]." |
| − | At the front end of the corridor, there are cabins for the people on board. There are beds, posters, [[Carry-all]]s and some |
+ | At the front end of the corridor, there are cabins for the people on board. There are beds, posters, [[Carry-all]]s and some [[Supply Crate]]s. |
| − | To the left, you can find Cabins 1 through 3 and the Captain's Quarters. Cabin 1 is locked by a code, which is "1869", found in the Abandoned PDA named "Sweet Offer". In this room, a [[Caps|Blue Cap]], [[Arcade Gorge Toy]] and an Abandoned PDA, "[[ |
+ | To the left, you can find Cabins 1 through 3 and the Captain's Quarters. Cabin 1 is locked by a code, which is "1869", found in the Abandoned PDA named "Sweet Offer". In this room, a [[Caps|Blue Cap]], [[Arcade Gorge Toy]] and an Abandoned PDA, "[[Databank#Responsible Autonomous Relationships|Responsible Autonomous Relationships]]", can be found. Cabin 3 contains a [[Prawn Suit Poster - Land]]. Another locked door at the end of the hallway, Captain's Quarters, can be unlocked with the code "2679", which is received later in the game on the radio. Inside the room, there is an [[Aurora Miniature]], an Aurora Poster, an Abandoned PDA titled "[[Databank#Captain's Log|Captain's Log]]" on the bed, and a Data Terminal that contains a Data Download titled "[[Databank#Alterra HQ - Last Recorded Transmissions|Alterra HQ - Last Recorded Transmissions]]", that unlocks the [[Neptune Escape Rocket]]. |
| − | To the right, you can find Cabins 4 through 7. Cabin 4 contains an Abandoned PDA named "[[ |
+ | To the right, you can find Cabins 4 through 7. Cabin 4 contains an Abandoned PDA named "[[Databank#Relationship Contract Legal Recording|Relationship Contract Legal Recording]]" and the [[Prawn Suit Poster - Sea]]. Facing this room there is Cabin 7 and the doorway is blocked by fire, which you will need to put out in order to go through. There, you will find another Abandoned PDA, "[[Databank#Alterra Alms Pamphlet|Alterra Alms Pamphlet]]". Cabin 6 has a [[Natural Selection 2 Poster]]. |
Backtrack to the T-corridor from earlier, and this time, go straight. This will lead to the Drive Room. |
Backtrack to the T-corridor from earlier, and this time, go straight. This will lead to the Drive Room. |
||
| Line 227: | Line 228: | ||
When entering the generator room, the PDA warns the player that radiation is at its maximum tolerable level. |
When entering the generator room, the PDA warns the player that radiation is at its maximum tolerable level. |
||
| − | The [[Cyclops Engine Efficiency Module]] for the [[Cyclops]] can also be found in the Drive Room, sticking out from the upgrade console at the center of the room. |
+ | The [[Cyclops Engine Efficiency Module]] for the [[Cyclops]] can also be found in the Drive Room, sticking out from the upgrade console at the center of the room. [[Bleeder]]s can also be found in the water around the generators. |
===Mentioned Areas=== |
===Mentioned Areas=== |
||
| − | The Aurora had a virtual cinema/theater, an |
+ | The Aurora had a virtual cinema/theater, an anti-gravity gym, VR suites, a robotics bay, a scanner room, several leisure decks, and several canteens/cafés. It is possible that these areas were destroyed either when the Aurora crashed or during the drive core detonation, or simply inaccessible in the Aurora's current state. |
| + | |||
| + | |||
<tabber> |
<tabber> |
||
| Line 261: | Line 264: | ||
* [[Arcade Gorge Toy]] |
* [[Arcade Gorge Toy]] |
||
* [[Aurora Miniature]] |
* [[Aurora Miniature]] |
||
| − | * [[ |
+ | * [[Aurora Poster]] |
* [[Caps|Blue Cap]] |
* [[Caps|Blue Cap]] |
||
* [[Carry-all]] |
* [[Carry-all]] |
||
| Line 269: | Line 272: | ||
* [[Filtered Water]] |
* [[Filtered Water]] |
||
* [[Flashlight]] |
* [[Flashlight]] |
||
| − | * [[ |
+ | * [[Keep Calm Poster]] |
* [[Lab Container|Large Sample Flask]] |
* [[Lab Container|Large Sample Flask]] |
||
* [[Lab Equipment|Microscope]] |
* [[Lab Equipment|Microscope]] |
||
| − | * [[ |
+ | * [[Natural Selection 2 Poster]] |
* [[Neptune Escape Rocket]] [[Blueprints|Blueprint]] |
* [[Neptune Escape Rocket]] [[Blueprints|Blueprint]] |
||
* [[Nutrient Block]] |
* [[Nutrient Block]] |
||
| − | * [[ |
+ | * [[Prawn Suit Poster - Land]] |
| − | * [[ |
+ | * [[Prawn Suit Poster - Sea]] |
* [[Repulsion Cannon]] [[Blueprints|Blueprint]] |
* [[Repulsion Cannon]] [[Blueprints|Blueprint]] |
||
* [[Lab Equipment|Sample Analyzer]] |
* [[Lab Equipment|Sample Analyzer]] |
||
* [[Seamoth Depth Module MK1]] |
* [[Seamoth Depth Module MK1]] |
||
* [[Storage Module]] |
* [[Storage Module]] |
||
| − | * [[ |
+ | * [[Supply Crate]] |
** [[Battery]] |
** [[Battery]] |
||
** [[Disinfected Water]] |
** [[Disinfected Water]] |
||
| Line 337: | Line 340: | ||
|Administration Office |
|Administration Office |
||
| |
| |
||
| − | * [[ |
+ | * [[Databank#Aurora Engineering Drone - Log|Aurora Engineering Drone - Log]] |
| − | * [[ |
+ | * [[Databank#Alterra Launches the Aurora|Alterra Launches the Aurora]] |
| − | * [[ |
+ | * [[Databank#Notes to self|Notes to self]] |
| |
| |
||
* 977 41 84 |
* 977 41 84 |
||
| Line 347: | Line 350: | ||
|Cargo Bay 3 |
|Cargo Bay 3 |
||
| |
| |
||
| − | * [[ |
+ | * [[Databank#Trans-Gov Profile: Alterra Corp.|Trans-Gov Profile: Alterra Corp.]] |
| |
| |
||
* 955 13 3 |
* 955 13 3 |
||
| Line 353: | Line 356: | ||
|Seamoth Bay |
|Seamoth Bay |
||
| |
| |
||
| − | * [[ |
+ | * [[Databank#VR Suite Log|VR Suite Log]] |
| |
| |
||
* 907 0 15 |
* 907 0 15 |
||
| Line 359: | Line 362: | ||
|Locker Room |
|Locker Room |
||
| |
| |
||
| − | * [[ |
+ | * [[Databank#Aurora Auxiliary Mission Orders|Aurora Auxiliary Mission Orders]] |
| − | * [[ |
+ | * [[Databank#Sweet Offer|Sweet Offer]] |
| |
| |
||
* 952 -3 -23 |
* 952 -3 -23 |
||
| Line 367: | Line 370: | ||
|Laboratory |
|Laboratory |
||
| |
| |
||
| − | * [[ |
+ | * [[Databank#Aurora Black Box Data|Aurora Black Box Data]] |
| − | * [[ |
+ | * [[Databank#Lab Access|Lab Access]] |
| − | * [[ |
+ | * [[Databank#What Can We Learn From the Hive Mind of Strader VI?|What Can We Learn From the Hive Mind of Strader VI?]] |
| |
| |
||
* 1041 -10 -3 |
* 1041 -10 -3 |
||
| Line 377: | Line 380: | ||
|Living Quarters |
|Living Quarters |
||
| |
| |
||
| − | * [[ |
+ | * [[Databank#Alterra Alms Pamphlet|Alterra Alms Pamphlet]] |
| − | * [[ |
+ | * [[Databank#Relationship Contract Legal Recording|Relationship Contract Legal Recording]] |
| − | * [[ |
+ | * [[Databank#Responsible Autonomous Relationships|Responsible Autonomous Relationships]] |
| − | * [[ |
+ | * [[Databank#Today's Menu|Today's Menu]] |
| |
| |
||
* 967 12 -47 |
* 967 12 -47 |
||
| Line 389: | Line 392: | ||
|[[Captain Hollister|Captain's Quarters]] |
|[[Captain Hollister|Captain's Quarters]] |
||
| |
| |
||
| − | * [[ |
+ | * [[Databank#Alterra HQ - Last Recorded Transmissions|Alterra HQ - Last Recorded Transmissions]] |
| − | * [[ |
+ | * [[Databank#Captain's Log|Captain's Log]] |
| |
| |
||
* 975 12 -77 |
* 975 12 -77 |
||
| Line 481: | Line 484: | ||
Cyclops Aurora Fox3D.png|Fox3D art including the [[Cyclops]] |
Cyclops Aurora Fox3D.png|Fox3D art including the [[Cyclops]] |
||
aurora.png|The Aurora crashing into 4546B after being shot down by the Quarantine Enforcement Platform seen in the Cinematic Trailer |
aurora.png|The Aurora crashing into 4546B after being shot down by the Quarantine Enforcement Platform seen in the Cinematic Trailer |
||
| + | </gallery> |
||
</tabber> |
</tabber> |
||
==Trivia== |
==Trivia== |
||
| + | * During the intro to the game, the player looks up out of [[Lifepod 5|Lifepod 5's]] top hatch to see the Aurora, just in time for a large explosion to emit from the side. This instance of the Aurora is not a 3D model, but is actually a very large version of the [[Aurora Poster]]. |
||
| + | * During the dialogue leading up to the explosion of the Aurora, it is said on Day 3 that the Aurora's Drive Core will cause a Quantum Detonation in two hours. However, this time incorrect, as the trigger is a full day later. It is unknown why the trigger was kept at a full day whilst the dialogue was changed to reflect a two hour timer. |
||
* On a phone number pad, the third letter for each number of the code to the captain's quarters door “2679” spells out “Cory”. This is in reference to Subnautica's art director Cory Strader. |
* On a phone number pad, the third letter for each number of the code to the captain's quarters door “2679” spells out “Cory”. This is in reference to Subnautica's art director Cory Strader. |
||
| + | * The Aurora is considered as a separate biome. |
||
| + | * In almost all open lockers within the Aurora, a small picture of an unknown woman can be found. The image is taken directly from the Player [[Concept Art]]. |
||
| + | **Two unused variations exist, one of them showing another unnamed woman, and one showing the character that would eventually become [[w:c:Subnautica-belowzero:Robin Goodall|Robin Ayou]]. |
||
[[fr:Aurora]] |
[[fr:Aurora]] |
||
[[Category:Aurora]] |
[[Category:Aurora]] |
||
Revision as of 17:01, 17 June 2020

|
Read at own risk This article contains unmarked spoilers. Players new to the game would want to avoid or be cautious toward this article. |
| This article is about Aurora in Subnautica. For the related article on the Below Zero Wiki, see Aurora. |
The Aurora suffered orbital hull failure. Cause: unknown. Zero human life signs detected.
― PDA, Dialogue
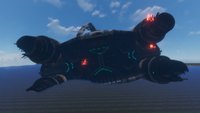
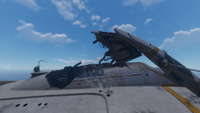
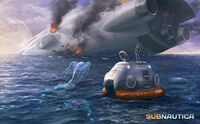
The Aurora is a spacecraft sent to the Ariadne Arm by the Alterra Corporation in order to build a phasegate. However, its secondary mission, unknown to most of the crew, was to search for and, possibly, rescue the survivors of the Degasi crew.
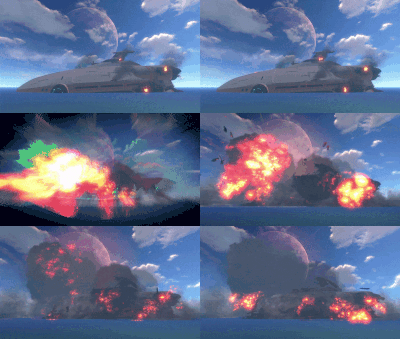
During a gravity slingshot maneuver around Planet 4546B, the Aurora was struck by a mysterious energy pulse, resulting in catastrophic hull failure, leading to its crash landing on the surface of the planet. It is later revealed that it was the Quarantine Enforcement Platform that shot it down. Many Lifepods were destroyed by the energy pulse and the ones that did launch were all compromised with the exception of two: Lifepod 5, which contained Ryley Robinson, and Lifepod 4, though its flotation devices seemingly failed or was possibly overturned by a Reaper Leviathan.
Upon crashing, the Aurora plowed into the terrain, unearthing it and leaving small sand hills around the ship, resulting in huge quantities of Metal Salvage and Supply Crates being dispersed within the vicinity of the ship, providing useful materials such as Food & Water, batteries, and titanium. Multiple Reaper Leviathans patrol the crash site.
By the time the Player awakens and begins his exploration of the area, all of the other Lifepods have been destroyed and their occupants have vanished. After the Aurora's Drive Core explodes, the ship's wreckage is surrounded by Radiation and is unapproachable without a Radiation Suit. While quite dangerous and far out, it is possible for the player to visit the Aurora early in-game before it explodes, although multiple tools are needed to properly explore the ship.
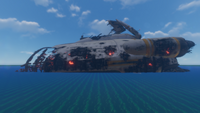
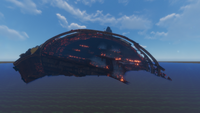
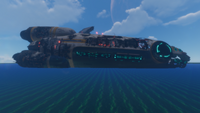
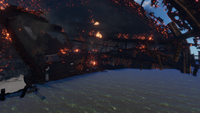
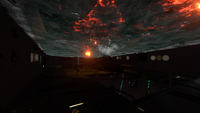
The Aurora is located on the far eastern edge of the map, with its bow facing north and its stern facing south. It is visible from the surface nearly anywhere on the map, making it a useful landmark, especially if the player lacks a compass. The ship is approximately 1,280 meters long from nose to thrusters. Including parts normally hidden by the terrain, it stands to be about 500 meters tall.
Mission
Main Mission
| Alterra Launches the Aurora |
PHASEGATE ANNOUNCED FOR THE ARIADNE ARM: ALTERRA LAUNCHES THE AURORA The furthest reaches of inhabited space are due to expand, as Alterra Corp launches a newly-constructed capital ship, carrying a phasegate bound for the Ariadne Arm. The Aurora will travel from spacedock on the edge of Alterra space, making hundreds of consecutive phasegate jumps through nine different trans-gov authorities, and arrive on the far side of the Ariadne Arm in three months' time. From there the command crew will pilot the ship beyond the final phasegate, arriving in the next solar system approximately 18 months later. There the elite team of engineers will begin a 6 month construction project on the new phasegate, a multi-trillion credit investment. In the absence of existing infrastructure in the region, the vessel is equipped with advanced thermal and nuclear power facilities. Alterra Corp. currently operates 9% of all phasegates in the galaxy. If the Aurora's mission is successful Alterra will have outmaneuvered a cabal of Mongolian corporations, operating a range of outposts and mines in the region. |
| Source: Pick up Abandoned PDA in the Aurora. |
Secret Mission
| Aurora Auxiliary Mission Orders |
- Mission: Search & Rescue Mission brief: Mission Details: |
| Source: Pick up Abandoned PDA in the Aurora. |
PDA Speech
The PDA reports the Aurora's state and information about the environment to the player as they survive. During exploration of the Aurora, it will explain the state of the ship around you.
Intro
| Trigger | Dialogue | |
|---|---|---|
| Starting The Game | "Attention. Hull failure imminent. All personnel abandon ship. Launch in 3...2...1..."
|
Situational Assessment Dialogue
| Trigger | Dialogue | |
|---|---|---|
| Exiting Lifepod 5 | "The Aurora suffered orbital hull failure. Cause: unknown. Zero human life signs detected."
| |
| Day 1 | "Detecting increased local radiation levels. Trend is consistent with damage to the Aurora's drive core, sustained during planetfall."
| |
| Day 2 | "Caution. Continued degradation of the Aurora's drive core may result in a quantum detonation. Continuing to monitor."
| |
| Day 3 | "Warning. Local radiation readings suggest the Aurora's drive core has reached critical state. Quantum detonation will occur within 2 hours."
| |
| Day 4 | "Emergency: A quantum detonation has occurred in the Aurora's drive core. The reactor will reach a super critical state in T- 10, 9, 8, 7, 6, 5, 4 [repeated], 3 [repeated], 2 [repeated to fade], 1 [not said]-"
|
Exploration Dialogue
| Entering the Crash Zone | "Lifeform readings in this region are sparse. The Aurora's radioactive fallout will have devastating effects on the alien ecosystem if not contained within the next 24 hours."
| |
| Aurora Entry | "Warning: ship's structural integrity is low. Fire suppression equipment and laser cutters may be required. Exploration is conducted at your own risk."
| |
| Aurora, further in | "Caution: scans show the digestive tracts of nearby lifeforms contain human tissues."
| |
| Aurora Interior | "Aurora systems are running on local reserve power. Unable to remotely download black box data."
| |
| Aurora Hallway | "Scans of damage to the Aurora do not match any known offensive technologies."
| |
| Aurora Prawn Bay | "Picking up a faint blackbox signature, originating on the other side of the hull breach in this room."
| |
| Aurora Drive Entry | "The drive core shielding sustained internal damage during collision. Do not attempt repair without appropriate qualifications."
| |
| Aurora Drive Interior | "Warning: local radiation at maximum tolerable level."
|
Aurora Exploration
Over the course of several in-game days, the PDA informs the Player on the condition of the degradation of The Aurora's engine, until its eventual explosion.
The explosion is focused towards the front section of the ship. The player can be killed by the explosion if in the crash zone biome when the event occurs.
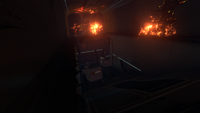
Only after the explosion is the Player able to explore inside the Aurora, but if they are not equipped with a radiation suit they will suffer damage over time. All three parts to the suit must be equipped in order to negate the radiation damage. Upon entry, the PDA warns that creatures around the Aurora contain traces of human tissue inside their digestive systems, indicating all bodies were consumed by Bleeders and Cave Crawlers. Also, fire and falling debris can injure the Player, and periodic shaking of the hull occurs. Further dangers are posed by the Reaper Leviathans that spawn around the ship, Cave Crawlers that litter the entrance area of the ship, and Bleeders in the underwater sections within the Aurora.
For avoiding the Reapers, there is usually one patrolling between the basin West of the Aurora, and the deep chasm beneath its bow. A Seamoth can safely sneak past by approaching from the Safe Shallows nearest to the Aurora and hugging the Aurora's side, until reaching a gap large enough for the Seamoth to squeeze through. It is recommended to disembark in shallow water so that the ramp beneath you will protect you from Reaper attack, though the Reaper doesn't normally swim that close to the entrance.
The following equipment is recommended and/or required for exploring the Aurora:
- Radiation Suit (required to approach the Aurora)
- Stasis Rifle, for self defense from Cave Crawlers, Bleeders, and possibly Reaper Leviathans.
- Repair Tool, for repairing the Drive Room and mending broken doors.
- Propulsion Cannon, for removing crate barriers at both the main hallway and Laboratory entrance, and to remove the Bleeders from the player's arms. A Repulsion Cannon is also a viable tool for removing crates and barriers. They could also be used for self defense against Cave Crawlers and bleeders.
- Fire Extinguisher, for various fires (some can be found on site)
- Laser Cutter, for entering various rooms including the Prawn Suit Bay and Aurora Black Box Terminal.
- A Seaglide for quick navigation through the submerged sections.
- A Survival Knife / Thermoblade to kill the Bleeders.
It's not possible to build a Seabase inside the Aurora; Base Pieces cannot be placed anywhere inside the ship, even if there's room. By extension, no interior modules can be placed either. It is possible to place Exterior Modules in the Aurora, notably the Exterior Growbed. A Seabase can be built right next to the Aurora with no problem.
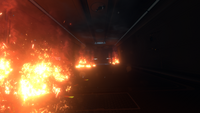
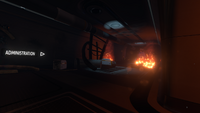
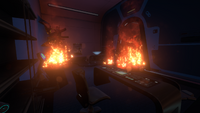
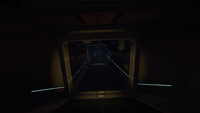
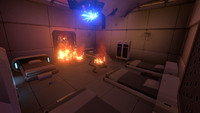
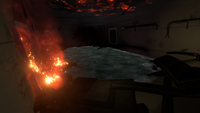
There are two routes to the inside of the ship. The first is on the right side of the shore area of the torn up front section and constitutes an entryway behind a Floodlight blocked off by various crates. Behind the crates are a Fire Extinguisher and a fire to put out, after which the Player will find themselves in the Laboratory. The second requires going up a ramp in the torn up front section of the Aurora, the Player can enter a corridor that leads inside the ship. On the way up, the user can find several Supply Crates with crafted items inside of them. The door leading to the T-section is partially blocked off by fire. Fortunately, there are a few Fire Extinguishers lying around, which can come in handy. When the Player enters, there will be a sign to the left that says Airlock.
To the right of the T-section, there is a door which is blocked off by fire. The left corridor leads to the "Cargo Bay 3". The right door leads to "Administration". These rooms are indicated by signs on the Aurora itself.
Administration Office
The administration office has a Data Terminal with a downloadable log titled "Alterra Launches the Aurora". The office also contains shelves, a Desk, and a Prawn Suit Poster - Land which can be taken. It also contains an Abandoned PDA with a Data Download under the headline "Notes to self", which will give the player the code "1454". You can also collect batteries on the shelf behind the main desk.
Cargo Bay 3
Down the left corridor, there is rubble blocking the entrance to Cargo Bay 3. Before this, an Abandoned PDA named "Aurora Engineering Drone - Log" next to a single Propulsion Cannon Fragment, right at the start of the ramp leading to the entrance. These can be gotten around dropping down from above or by using the Propulsion Cannon or Repulsion Cannon to move these out of the way. Alternatively, the player can jump and sprint from the slope to the first large cargo container, and then from there to the top of the pile. Note that in doing so, there is a fire that cannot be put out; it must simply be avoided. There is then a locked door with a keypad that can be interacted with. Entering the code from the previously mentioned Data Download into the keypad will open the door. Alternatively, you can unlock the door without using a code from the other side. The Cargo Bay is a large area full of cargo containers, Supply Crates, forklifts, and a few other miscellaneous things. Very rarely, up to three Cyclops Engine Fragments can appear inside some of the large cargo containers
There is a cargo elevator in the cargo bay, which is stuck halfway. Close to it, there's an Abandoned PDA named "Trans-Gov Profile: Alterra Corp.".
Following the ramp down reveals an underwater section which leads to a T-corridor. To the left, there will be a Sealed Door. To the right, there is a room called the "Seamoth Bay".
Seamoth Bay
The door to this room is locked, but there is a damaged panel which the Repair Tool can repair. When this panel is repaired, the door is unlocked, and the player can enter. The Seamoth Bay contains two pieces of a damaged Seamoth, which can be scanned. It also has a Seamoth Depth Module MK1 Upgrade Module and an Abandoned PDA called "VR Suite Log".
Locker Room
Cutting through the Sealed Door will lead the player into a locker room. Some of the lockers are open and have loot inside, like batteries, first-aid kits, and water. There is an Abandoned PDA with a Data Download titled "Sweet Offer". It will give the player the code "1869", required for Cabin 1 in the Living Quarters.
Prawn Suit Bay
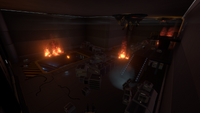
Leaving the locker room, there will be a sign labeled "Prawn Bay". This is the location where the Prawn Suit Fragments will be found. The door to this room is locked, and like before, has a panel that needs to be repaired. Once the door is unlocked the player can proceed into the room. This room has multiple Prawn Suits hanging from the ceiling, presumably waiting to be deployed. To the right is a pile of rubble with broken Prawn Suit Fragments and other miscellaneous things piled on top of each other. The fragments may require nearby fires to be put out in order to be scanned. Among the rubble is a Storage Module, located on an upgrade console. Next to that is a ramp blocked off by fire and rubble. Once those are cleared, there is a door that leads to the "Living Quarters".
In the water is a large system of pipes and wires. In the system of wires is a hole where one can swim through to enter the room containing the Aurora's black box data. Heading north through a doorway will lead to the Laboratory, however, one must use a Laser Cutter to open a door to enter.
Laboratory
Coming from the Aurora entrance: Remove the crates blocking the doorway, then follow the hallway until there is a fire. On the right lies a fire extinguisher which is useful for putting out the aforementioned fire. Continue until a submerged room is reached.
Coming through the Prawn Suit Bay: Go underwater at the far left corner from the entrance to the Bay to find a tunnel leading to the lab. A room prior to the actual laboratory contains a Data Terminal with a Data Download titled "Aurora Black Box Data". There also is a Supply Crate containing a Battery in front of a locked door that requires the Laser Cutter. Behind it is the actual laboratory.
A nearby Abandoned PDA has a Data Download titled "Lab Access" containing the code, 6483, for the two nearby doors. These grant access to the storage room, where three Large Sample Flasks can be found, one Cylindrical Sample Flask, a Microscope and a Sample Analyzer. The two Supply Crates contain Disinfected Water and there's a Data Terminal that states it de-corrupted the player's PDA and unlocks the Repulsion Cannon. On a Counter close to the terminal, there's also an Abandoned PDA named "What Can We Learn From the Hive Mind of Strader VI?".
Living Quarters
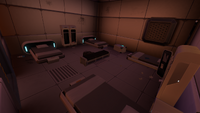
The Living Quarters are various rooms that provided living conditions for the various crew and passengers on the ship. If the player goes right, there is a Supply room filled with Filtered Water and Nutrient Blocks. If the player goes left, there is a Canteen. There are bar tables and chairs lying on the ground, along with a few handy Supply Crates, a vending machine against the wall, a bar with single wall shelves, a fire extinguisher is on the wall behind the bar as well as a Keep Calm Poster, which can be taken. Sitting atop the bar is the Abandoned PDA named "Today's Menu."
At the front end of the corridor, there are cabins for the people on board. There are beds, posters, Carry-alls and some Supply Crates.
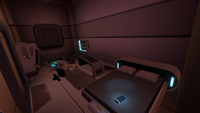
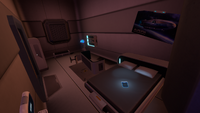
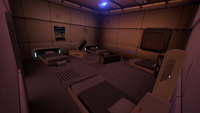
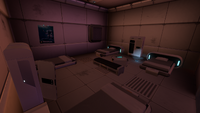
To the left, you can find Cabins 1 through 3 and the Captain's Quarters. Cabin 1 is locked by a code, which is "1869", found in the Abandoned PDA named "Sweet Offer". In this room, a Blue Cap, Arcade Gorge Toy and an Abandoned PDA, "Responsible Autonomous Relationships", can be found. Cabin 3 contains a Prawn Suit Poster - Land. Another locked door at the end of the hallway, Captain's Quarters, can be unlocked with the code "2679", which is received later in the game on the radio. Inside the room, there is an Aurora Miniature, an Aurora Poster, an Abandoned PDA titled "Captain's Log" on the bed, and a Data Terminal that contains a Data Download titled "Alterra HQ - Last Recorded Transmissions", that unlocks the Neptune Escape Rocket.
To the right, you can find Cabins 4 through 7. Cabin 4 contains an Abandoned PDA named "Relationship Contract Legal Recording" and the Prawn Suit Poster - Sea. Facing this room there is Cabin 7 and the doorway is blocked by fire, which you will need to put out in order to go through. There, you will find another Abandoned PDA, "Alterra Alms Pamphlet". Cabin 6 has a Natural Selection 2 Poster.
Backtrack to the T-corridor from earlier, and this time, go straight. This will lead to the Drive Room.
Drive Room
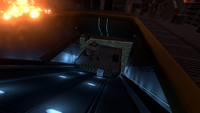
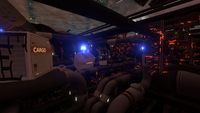
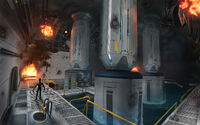
Inside the Drive Room are four large generators. They are connected by catwalks, though some are underwater and heavily damaged. The generators are covered in breaches, and the Player's objective is to repair them using the Repair Tool, however, it should be noted that the flooded part of the drive core, where most repairs need to be done, is full of Bleeders. Repairing the breaches removes the radiation entirely after three in-game days.
When entering the generator room, the PDA warns the player that radiation is at its maximum tolerable level.
The Cyclops Engine Efficiency Module for the Cyclops can also be found in the Drive Room, sticking out from the upgrade console at the center of the room. Bleeders can also be found in the water around the generators.
Mentioned Areas
The Aurora had a virtual cinema/theater, an anti-gravity gym, VR suites, a robotics bay, a scanner room, several leisure decks, and several canteens/cafés. It is possible that these areas were destroyed either when the Aurora crashed or during the drive core detonation, or simply inaccessible in the Aurora's current state.
Data Bank Entries
|
Ship Class: Alterra Long-Range Capital Ship Status: Engineering section: Habitation section: |
|
The Aurora's drive core is shielded by a thick metal shell, which breached in multiple locations shortly after the crash. Once breached it will continue to leak radiation into the surrounding environment until the breaches are sealed. After that point the radiation in the environment will dissipate over time. This procedure should only be attempted with appropriate radiation protection and a fully charged repair tool. |
Data Downloads Checklist
| Ship Section | Name of Data Bank Entry | Coordinates |
|---|---|---|
| Administration Office |
| |
| Cargo Bay 3 |
| |
| Seamoth Bay |
| |
| Locker Room |
| |
| Laboratory |
| |
| Living Quarters |
| |
| Captain's Quarters |
|
Gallery
Trivia
- During the intro to the game, the player looks up out of Lifepod 5's top hatch to see the Aurora, just in time for a large explosion to emit from the side. This instance of the Aurora is not a 3D model, but is actually a very large version of the Aurora Poster.
- During the dialogue leading up to the explosion of the Aurora, it is said on Day 3 that the Aurora's Drive Core will cause a Quantum Detonation in two hours. However, this time incorrect, as the trigger is a full day later. It is unknown why the trigger was kept at a full day whilst the dialogue was changed to reflect a two hour timer.
- On a phone number pad, the third letter for each number of the code to the captain's quarters door “2679” spells out “Cory”. This is in reference to Subnautica's art director Cory Strader.
- The Aurora is considered as a separate biome.
- In almost all open lockers within the Aurora, a small picture of an unknown woman can be found. The image is taken directly from the Player Concept Art.
- Two unused variations exist, one of them showing another unnamed woman, and one showing the character that would eventually become Robin Ayou.
